Advertisement
ProcessTimer for MAC – Display CPU utilization and more. This app was created by GETSIXTYFOUR Inc. and now updated into the last version. Download this System Utilities app for free now on Apps4Mac.com
ProcessTimer for MAC Latest Version
ProcessTimer for Mac: Free Download + Review [Latest Version]. Before you download the .dmg file, here we go some fact about ProcessTimer that maybe you want to need to know.
Advertisement
| App Name | ProcessTimer App |
| File Size | 2.1 MB |
| Developer | GETSIXTYFOUR |
| Update | 2016-08-27 |
| Version | 1.7.4 |
| Requirement | Mac OS X 10.7.0 |
| License | Paid |
About ProcessTimer App for MAC
ProcessTimer displays the architecture, CPU utilization and percentage of real memory used by the process that has GUI focus. By default, it “follows” the process that has GUI focus, the frontmost app. The default behavior can be changed by Hold Process, and ProcessTimer will follow the specific process for the remainder of the lifetime of the process, regardless if the frontmost app has changed.
There are plenty of features packed in ProcessTimer besides CPU utilization reporting. It also has formidable screenshot grabbing capabilities. It can grab a screenshot of an app in five unique ways.
Features
- Open/activate an app
- Set an app to open at login
- Open the preferences file (plist) of an app
- Show the Finder info panel for an app
- Reveal an app’s location in Finder
- Grab a screenshot of an app in five unique ways
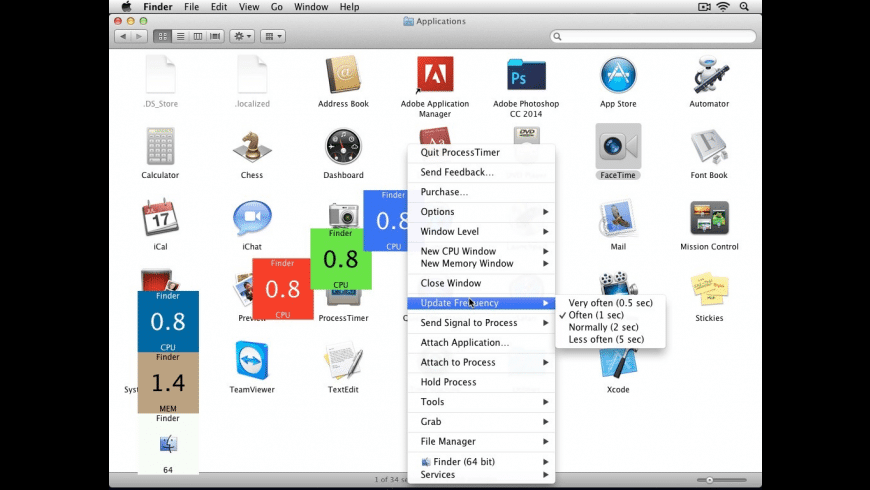 ProcessTimer for MAC Preview/caption]
New Features
Version 1.7.4:
Note: Now requires OS X 10.7 or later running on a 64-bit Intel processor.
Note: To quit ProcessTimer or adjust ProcessTimer’s settings, right-click on one of ProcessTimer’s windows.
Changed
- Code rewrite
- Add incompatible version check
- Fix for Attach to Process menu population (new algorithm)
- Fix memory calculation (was using total memory installed vs memory available for use)
- Add Show All and Hide Others
- Recode File Manager, show one level less and rename to Show Package Contents and speed up icon generation and Open With menu has been improved, does not show duplicate entries if they have the same build version
- Recode Open Preferences File and rename to Open Preferences (click to reveal)
- Add Services menu item and disable context menu plug-ins
- Implement Force Quit (use alt modifier key to show Force Quit)
- Implement Force Quit detection (Quit automatically changes to Force Quit)
- Add more services! (Finder services, etc.)
- Add support for color palettes
- Add Open With (click to open)
- Bug fix for Take Screen Shot, apps like google chrome work now! (status bar items are not captured)
- Click process name to activate
- Preview taking screenshots 12 x 12 pixels bug
Installing Apps on MAC
Most Mac OS applications downloaded from outside the App Store come inside a DMG file. Like if you wanna download ProcessTimer for mac from this page, you’ll directly get the .dmg installation file into your MAC.
- First, download the ProcessTimer .dmg installation file from the official link on above
- Double-click the DMG file to open it, and you’ll see a Finder window.
- Often these will include the application itself, some form of arrow, and a shortcut to the Applications folder.
- Simply drag the application’s icon to your Applications folder
- And you’re done: the ProcessTimer is now installed.
- When you’re done installing: just click the “Eject” arrow.
- Then you can feel free to delete the original DMG file: you don’t need it anymore.
- Now, enjoy ProcessTimer for MAC !
You don’t have to put your programs in the Applications folder, though: they’ll run from anywhere. Some people create a “Games” directory, to keep games separate from other applications. But Applications is the most convenient place to put things, so we suggest you just put everything there.
DMG files are mounted by your system, like a sort of virtual hard drive. When you’re done installing the application, it’s a good idea to unmount the DMG in Finder.
Uninstall Apps on MAC
Removing ProcessTimer apps is more than just moving them to the Trash — it’s completely uninstalling them. To completely uninstall a program on MacBook/iMac, you have to choose one of the options on below.
Method 1: Remove apps using Launchpad
Another manual way to delete ProcessTimer apps from your Mac is using the Launchpad. Here’s how it works:
- Click Launchpad icon in your Mac’s Dock.
- Find the ProcessTimer that you want to delete.
- Click and hold the ProcessTimer icon’s until it starts shaking.
- Click X in the top-left corner of the app icon.
- Click Delete.
Method 2: Delete MAC apps with CleanMyMac X
Now it’s time for the safe and quick app uninstalling option. There’s a safest way to uninstall ProcessTimer on Mac without searching all over your Mac, and that’s by using CleanMyMac X.
- Launch CleanMyMac X and click on Uninstaller in the left menu.
- Select the , you can either uninstall it or, if it’s not acting as it should, you can perform an Application Reset.
- Click on Uninstall or choose Application Reset at the top.
- Now that the application cleanup is complete, you can view a log of the removed items, or go back to your app list to uninstall more.
- And you’re done to remove ProcessTimer from your MAC!
ProcessTimer Alternative App for MAC
Here we go some list of an alternative/related app that you must try to install into your lovely MAC OSX
Disclaimer
This ProcessTimer .dmg installation file is absolutely not hosted in Apps4Mac.com. When you click the “Download” button on this page, files will downloading straight from the owner sources Official Server. ProcessTimer is definitely an app for MAC that developed by Inc. We are not directly affiliated with them. All trademarks, registered trademarks, product names and business names or logos that mentioned in right here are the assets of their respective owners. We’re DMCA-compliant and gladly to work with you.